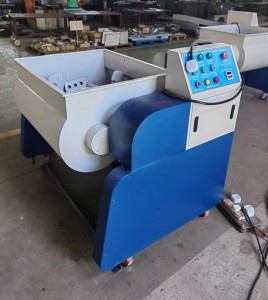
Steel Tensile Strength Test Equipment
- Product Description


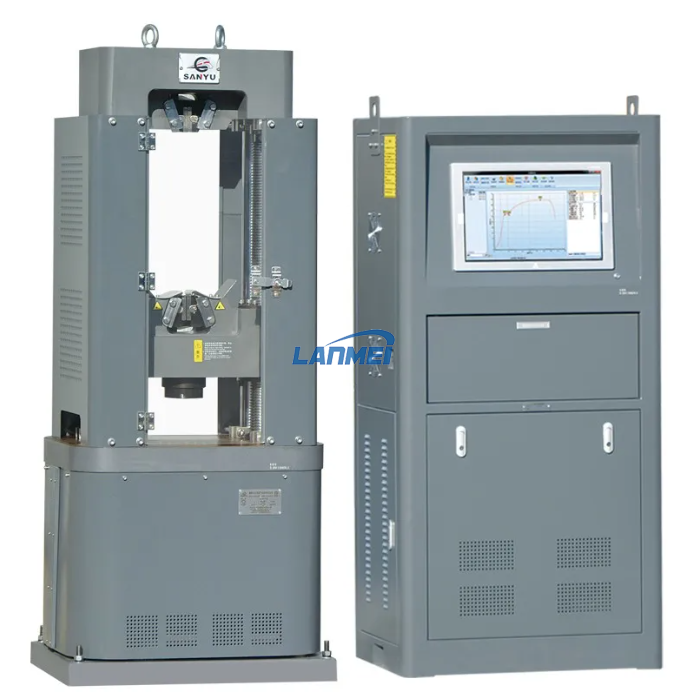
WAW series electro-hydraulic servo universal testing machine
GB/T16826-2008 “electro-hydraulic servo universal testing machine,” JJG1063-2010 “electro-hydraulic servo universal testing machine,” and GB/T228.1-2010 “metallic materials – method of tensile testing at room temperature” are the foundations for the WAW series electro-hydraulic servo universal testing machine. Based on that, a brand-new generation of material testing equipment was created. A variety of curves, including stress, deformation, displacement, and other closed loop control modes, can be displayed using this series of testing equipment, which is loaded with hydraulic and uses electro-hydraulic servo control technology for tensile, compress, bend, and shear testing of metal and non-metallic materials. It automatically captures and saves data. It complies with GB
ISO, ASTM, DIN, JIS and other standards.
The features of WAW series electro-hydraulic servo universal testing machine (type B):
1. The test uses an automated control mode with a microprocessor, and includes features for stress rate, strain rate, stress maintenance, and strain maintenance;
2. Use a very accurate hub-and-spoke force sensor;
3.A host that uses double screws and a four-column design tests the spatial structure
4. Use the high-speed Ethernet connection port to communicate with the PC;
5. Use a standard database to manage test data;
6.A gorgeous protective net with outstanding strength, toughness, and protection
5.Operation method
Operation method of rebar test
1 Turn on the power, confirm that the emergency stop button is up, then activate the controller on the panel.
2 Choose and install the appropriate size clamp in accordance with the test’s specifications and content. The size of the specimen must be covered by the clamp’s size range. It should be understood that the clamp’s installation direction should
be consistent with the clamp’s indication.
3 Start the computer, sign in to the “TESTMASTER” program, and enter the control system. Modify the test settings in accordance with the test criteria (the “test machine software manual” shows how to use the control system).
4 Open the fence, press the “jaw loosen” button on the control panel or the hand control box to open the lower jaw, insert the specimen into the jaw in accordance with the test standard requirements, and fix the specimens in the jaw. Next, open the top jaw, press the “mid girder rising” button to raise the mid girder, adjust the specimen’s position in the top jaw, and then close the top jaw when the position is appropriate.
5 Close the fence, tare the displacement value, and begin the test operation (the “test machine software manual” shows the control system’s operating procedure).
6 Following the test, data is automatically logged in the control system, and data printing settings are specified in the control system software (the “test machine software manual” shows how to set up the printer).
⑦ To return the equipment to its initial condition, remove the specimen in accordance with the test requirements, close the supply valve and open the return valve (WEW series models), or press the “stop” button in the software (WAW/WAWD series models).
⑧ software, turn off the pump, the controller, and the main power,As soon as possible, wipe and remove any residue from the worktable, screws, and snap gauge to prevent damage to the equipment’s transmission components.
6.Daily maintenance
Maintenance principle
1Check for oil leaks routinely, maintain the integrity of the machine’s parts, and check each time before starting the machine (pay attention to particular elements like the pipeline, each control valve, and the oil tank).
2 The piston should be lowered to the lowest position after each test, and the work surface should be promptly cleaned for anti-rust treatment.
Operation 3 You should do the appropriate inspection and maintenance on the testing equipment after some time has passed:Clean the rust and steel debris from the clamp and girder’s sliding surfaces. Check the chain’s tightness every six months. Grease the sliding parts often. Paint the easily corroded sections with anti-rust oil. Continue with the anti-rusting and cleaning.
4 Keep away from extreme temperatures, excessive moisture, dust, corrosive materials, and water erosion tools.
5 After 2000 hours of use or yearly, replace the hydraulic oil.
6 Installing additional software will cause the testing control system software to behave erratically and expose the machine to malware infestation.
⑦ The connecting wire between the computer and the host computer and the power plug socket must be checked before the machine is started to see if it is correct or if it is loosening.
8 It is not permitted to hot connect the power and signal lines at any time since doing so might easily harm the control element.
9 Please refrain from randomly pressing the buttons on the control cabinet panel, operation box, or test software during the test.During the test, the girder must not be raised or lowered. During the exam, avoid placing your hand inside the test area.
10 Don’t touch the tools or any other links while the test is running to prevent data accuracy from being impacted.
11 Recheck the oil tank’s level frequently.
12 Regularly check to see if the controller’s line of connection is in excellent contact; if it isn’t, it has to be tightened.
13 If the test equipment is not used for a long time after the test, please turn off the main power, and during the equipment’s stop process, run the equipment often with no load. This will guarantee that when the equipment is used once more, all components are working properly.


